Using Snapshots
- Authors
- Name
- Michael Bui
Overview
Snapshots let you back up data on Amazon EBS volumes. They save the state of the volume at a point-in-time and subsequent backups are incremental.
Snapshots are useful for copying over EBS volumes from one availability zone to another. You can create a snapshot of an EBS volume then create a new volume based on the snapshot.
You can also use snapshots to create your own custom images with preconfigured settings then launch a new EC2 instance with those settings.
In this lab, we'll look at creating a snapshot for an EBS volume and creating a new volume in another availability zone. We'll also look at creating our own custom AMI with an apache http server installed.
Moving EBS Volumes with Snapshots
In the the Create and Attach EBS Volumes lab we created an EBS volume in the west-2a availability zone. We're going to create a snapshot of that EBS volume and move it to west-2b
- Go to
EC2->Elastic Block Store->Snapshots->Create Snapshot - Create a snapshot of a volume
- Choose the volume to create a snapshot of
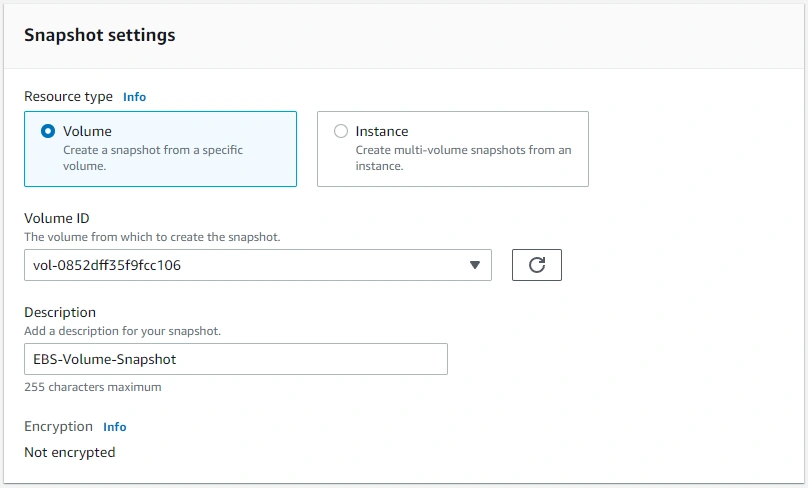
- From the Snapshot select
Create volume from snapshot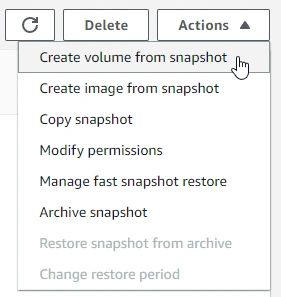
- Select the us-west-2b availability zone

- Attach the volume to the
Lab-3EC2 instance we made in a previous lab - SSH into
Lab-3
- Mount the volume
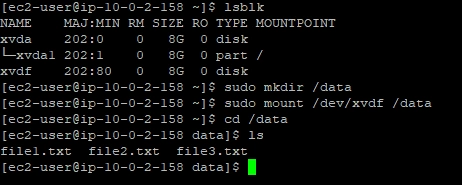
- All the data we had from the previous EBS volume from availability zone west-2a has been moved to west-2b on to this EC2 instance
Creating an AMI From a Snapshot
- Create an EC2 instance with the following startup script

#!/bin/bash
yum update -y
yum install -y httpd
systemctl start httpd
systemctl enable httpd
- Go to the http://(ip address here) and you'll see the default apache webpage

- Create a Snapshot of the instance
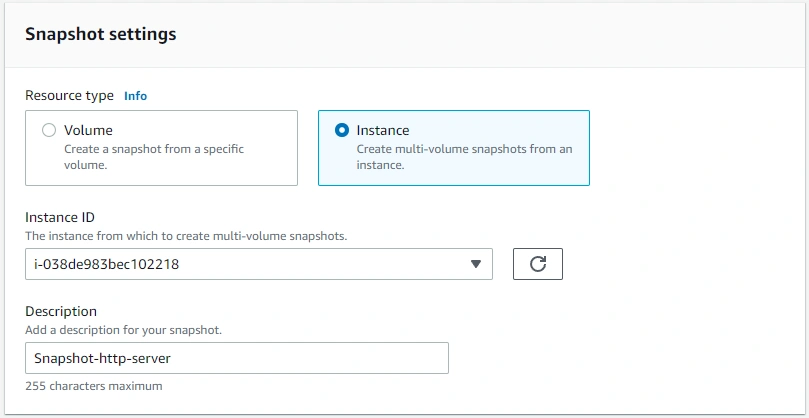
- From the snapshot - select
Create image from snapshot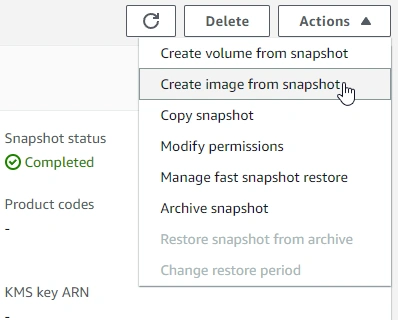
- Provide a name/description and leave defaults
- Alternatively, you can skip creating a snapshot and create an image straight from the EC2 dashboard by right clicking the instance and selecting
create image
- Go to
EC2->Images->AMIsselect the AMI and clickLaunch instance from AMI - Alternatively, go to launch an instance and select your AMI under
My AMIs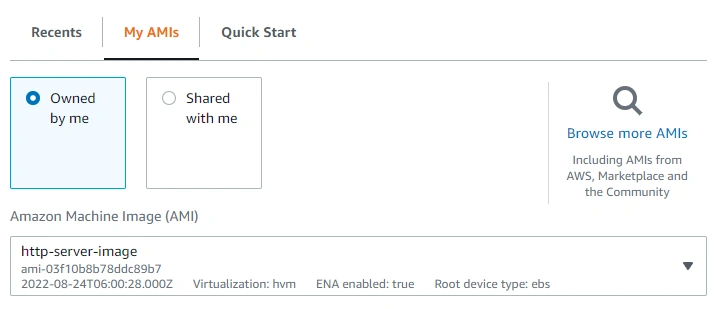
- Go to the http://(ip address here) of the newly created EC2 instance & without any configurations you should see the apache http server default page