Enabling Multi-Factor Authentication
- Authors
- Name
- Michael Bui
Overview
Multi-Factory Authentication (MFA) is when a user is prompted for an additional form of identification to access a resource. This can be a text message with a code, an authentication app, or a biometric.
There are many ways to enable MFA in Azure. In this lab, we'll go through the different ways to set it up.
Security Defaults
This is the quickest way to enable MFA for all users. When enabled, all users in your tenant must register for MFA
- Browse to
Azure Active Directory->Properties->Manage Security Defaults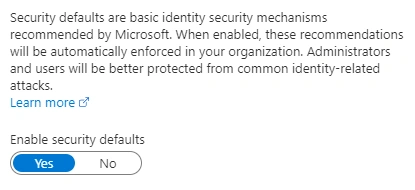 Once MFA is set up, users have 14 days from their first sign in attempt to register. If users fail to register after 14 days, they will be blocked from accessing resources. Read more on security defaults here
Per User Authentication
You can enable MFA for specific users.
- Browse to
Azure Active Directory->Users->Per-user MFA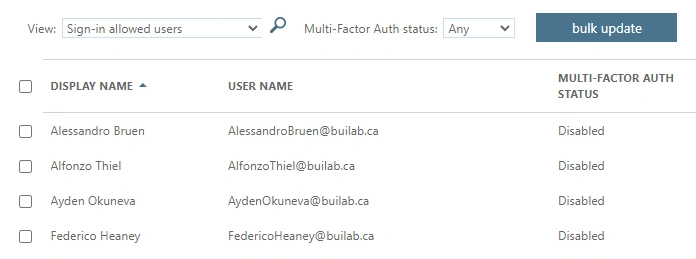
Identity Protection
This method of enforcing MFA activates when a user's risk score is above the threshold amount set. Several factors can contribute to the sign in risk, such as logging in from a different location than normal, using a different device, or other abnormal activity detected by Microsoft.
- Browse to
Azure Active Directory->Security->Identity Protection->Sign-in risk policy - Adjust the sign-in risk level & set control to grant access with MFA
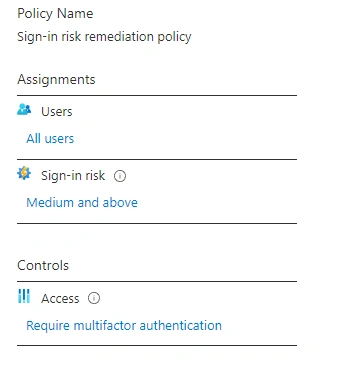
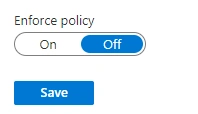
- Remember to enforce the policy and save
Conditional Access
Conditional Access allows for more complex rules for requiring MFA.
- You can exclude certain users, such as a break-glass account, in the event that conditional access locks every user out.
- You can require MFA only for certain applications or resources
- Assign named locations to not require MFA (such as an internal IP address)
- Browse to
Azure AD Conditional Access- You can similarly set this up in the endpoint manager
- Select which group of users this policy will apply to - We will be using the
Sales - Vancouverfor this demo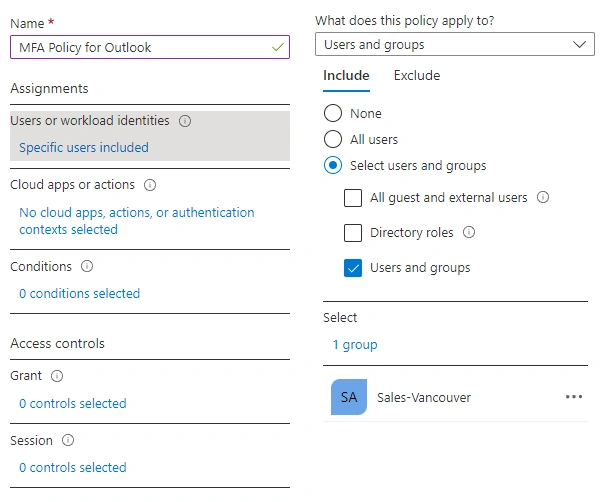
- Choose which resource you want to apply conditional access to - For this demo, we are going with Office 365
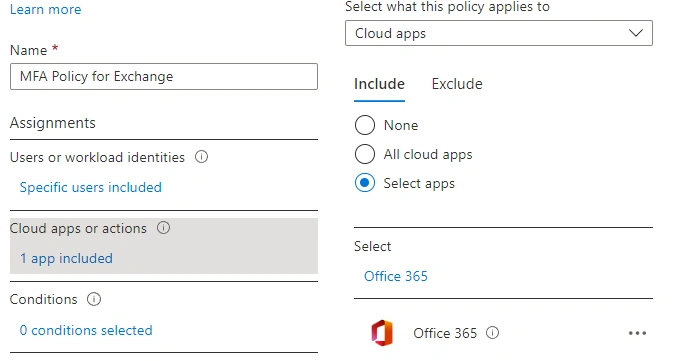
- For
Access controlswe're going to set grant, but require the user to perform MFA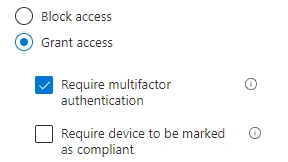
- Turn the policy on and create
Demo
We're going to log on as Alfonzo Thiel who is a part of the Sales - Vancouver group in my AAD
- Logging on as Alfonzo to
portal.azure.comsigns me in without issue
- Logging into
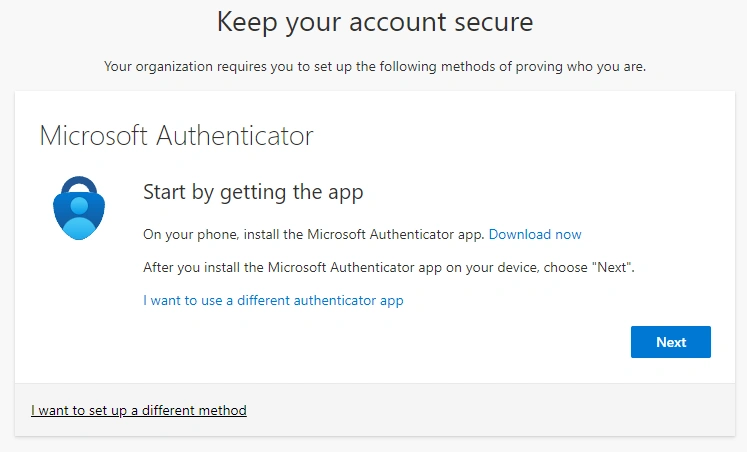
portal.office.com, I am greeted with a screen asking for information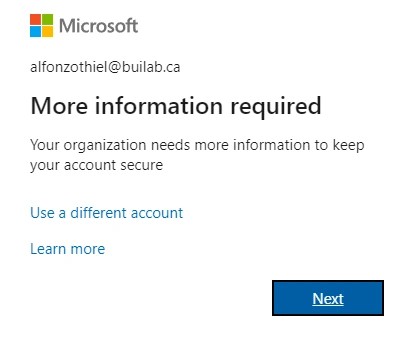
- Clicking next will prompt me to set up MFA if I want to access Office 365 resources
Summary
In this lab, we've gone over the various ways to set up MFA
- Security Defaults
- The easiest way to set up MFA for all users
- Has a 14-day period for users to sign up for MFA
- Per User Authentication
- Set up MFA for only certain users
- Identity Protection
- Require MFA for logins that are flagged at a specific risk level
- Helps secure accounts from malicious attacks
- Conditional Access
- Has the most granular controls for setting up MFA
- Can choose to include/exclude certain groups for each policy
- Can enforce MFA based on specific criteria such as specific app or location